LaTeX: images, tables and references
Images
Load graphicx and use \includegraphics. Upload the picture first: with Document files or Upload image in the toolbar for a document, or in the file tree of a project.
\documentclass{article}
\usepackage{graphicx}

\begin{document}
\includegraphics[width=0.8\linewidth]{photo.jpg}
\end{document}

| Option | What it does |
|---|---|
width=5cm or width=0.5\linewidth |
Width, fixed or as a share of the text width. |
height=4cm |
Height. Give only one of width and height to keep the proportions. |
scale=0.5 |
Scale the original size. |
angle=90 |
Rotate. |
keepaspectratio |
With both width and height, fit inside without stretching. |
PNG, JPG and PDF images work. SVG, GIF and WebP do not: convert them to PNG or PDF first. In TypstDrive, the image picker and Upload image insert \includegraphics and add graphicx to the preamble for you.
Figures and captions
A figure environment gives an image a caption and a number. Figures float: LaTeX moves them to a good spot, usually the top of a page, so the text does not get big gaps.
\documentclass{article}
\usepackage{graphicx}

\begin{document}
\begin{figure}[htbp]
  \centering
  \includegraphics[width=0.7\linewidth]{photo.jpg}
  \caption{The view from the observatory.}
  \label{fig:observatory}
\end{figure}

As Figure~\ref{fig:observatory} shows, the sky was clear.
\end{document}
[htbp]lists where the figure may go: here, top, bottom or a separate page.[H]from thefloatpackage forces "exactly here".\labelmust come after\caption, or the reference gets the wrong number.~before\refkeeps "Figure" and the number on the same line.
Side-by-side images
\documentclass{article}
\usepackage{graphicx}
\usepackage{subcaption}

\begin{document}
\begin{figure}[htbp]
  \centering
  \begin{subfigure}{0.45\linewidth}
    \includegraphics[width=\linewidth]{photo.jpg}
    \caption{Before}
  \end{subfigure}
  \hfill
  \begin{subfigure}{0.45\linewidth}
    \includegraphics[width=\linewidth]{photo.jpg}
    \caption{After}
  \end{subfigure}
  \caption{The same view, a year apart.}
\end{figure}
\end{document}
Tables
tabular builds a table. The column specification says how many columns there are and how they are aligned: l left, c centre, r right, p{3cm} a paragraph column with a fixed width, and | for a vertical line.

& separates cells and \\ ends a row. \hline draws a horizontal line.
Professional tables with booktabs
Good tables use few lines. booktabs gives well-spaced rules, and the result looks like a printed book.
\documentclass{article}
\usepackage{booktabs}

\begin{document}
\begin{table}[htbp]
  \centering
  \caption{Results on the test set.}
  \label{tab:results}
  \begin{tabular}{lrr}
    \toprule
    Method   & Time (ms) & Accuracy \\
    \midrule
    Baseline & 120       & 81.2\%   \\
    Ours     & 45        & 88.9\%   \\
    \bottomrule
  \end{tabular}
\end{table}

Table~\ref{tab:results} compares both methods.
\end{document}
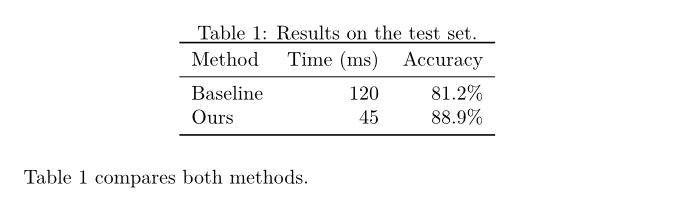
For tables, the caption usually goes above, as in this example.
Merged cells, wide columns and colours
\documentclass{article}
\usepackage{booktabs}
\usepackage{multirow}
\usepackage{tabularx}
\usepackage[table]{xcolor}

\begin{document}
\begin{tabularx}{\linewidth}{l X r}
  \toprule
  \multicolumn{2}{c}{Product} & Price \\
  \cmidrule(r){1-2}
  \rowcolor{gray!15}
  Pen      & Blue ink, fine tip, refillable & \$2 \\
  Notebook & A5, dotted, 120 pages           & \$9 \\
  \multirow{2}{*}{Bundle} & Pen and notebook & \$10 \\
           & Gift wrapped                    & \$12 \\
  \bottomrule
\end{tabularx}
\end{document}
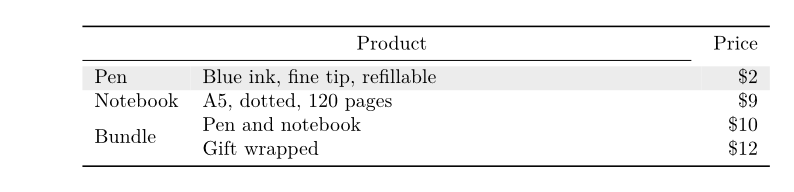
\multicolumn{2}{c}{...}spans two columns.\multirow{2}{*}{...}frommultirowspans two rows.tabularxwith anXcolumn fills the given width and wraps long text.\rowcolorfromxcolorwith thetableoption colours a row.
Long tables that need to break across pages use the longtable package.
Cross-references
Anything numbered can be labelled with \label and referred to with \ref (the number) or \pageref (the page).
\documentclass{article}
\usepackage{amsmath}

\begin{document}
\section{Introduction}\label{sec:intro}
We return to this in Section~\ref{sec:results} on page~\pageref{sec:results}.

\begin{equation}
  E = mc^2 \label{eq:energy}
\end{equation}

\section{Results}\label{sec:results}
As stated in Section~\ref{sec:intro}, equation~\eqref{eq:energy} holds.
\end{document}
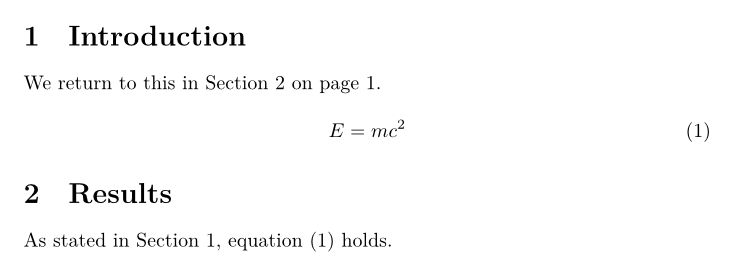
References need a second LaTeX run to settle. TypstDrive runs LaTeX as many times as needed, so you never see ?? for long.
For "Figure 1" and "Section 2" written for you, load cleveref after hyperref and use \cref{fig:observatory}.
Links
hyperref turns every reference, citation and table of contents entry into a link, and adds web links.
\documentclass{article}
\usepackage{hyperref}
\hypersetup{colorlinks=true, linkcolor=blue, urlcolor=blue}

\begin{document}
Visit \url{https://typst.app} or read the
\href{https://www.latex-project.org/help/documentation/}{LaTeX documentation}.
\end{document}

Load hyperref near the end of the preamble; it works best after the other packages. In TypstDrive, inserting a link from the toolbar adds hyperref for you.
Footnotes
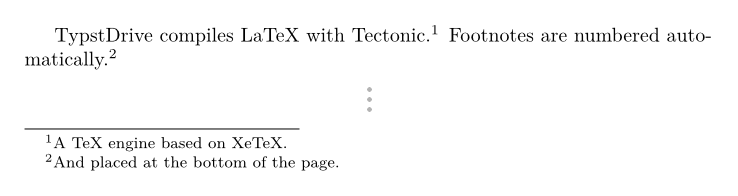
TypstDrive compiles LaTeX with Tectonic.\footnote{A TeX engine based on XeTeX.}
Footnotes are numbered automatically.\footnote{And placed at the bottom of the page.}
Lists of figures and tables

Next steps
Add citations in Bibliographies.